Custom Domain Temp Mail: Add Your Own Domain for Free
Connect your own domain to Tmailor and create private temp mail addresses at no extra cost. The feature works on iOS, Android, and the web with the same receive-only, reusable inbox flow.
Quick access
Start on the platform you already use
The screenshots below come from an iPhone, but the flow is effectively the same on Android and on the web interface.
TL;DR / Key Takeaways
- You can connect any domain you own and use it for private temp mail on Tmailor.
- The feature is free; you do not need separate mailbox hosting just to receive verification emails and low-stakes sign-up mail.
- It works across iOS, Android, and the web. This guide uses iPhone screenshots because the mobile layout is easy to follow.
- Your custom-domain inbox stays receive-only, which helps prevent abuse and keeps the workflow focused on privacy and inbound mail.
- Messages remain visible for about 24 hours, while the address itself can still be reopened later through token-based reuse.
- Using your own domain can reduce the friction that sometimes affects shared disposable domains on sign-up pages and OTP flows.
Why Use Your Own Domain for Temp Mail?
Your own domain makes temporary email look more natural, gives you more control, and removes the need to rely only on public shared domains.
Shared disposable domains are convenient, but a custom domain gives you another layer of flexibility. You can create addresses like signup@yourdomain.com, test@yourbrand.io, or promo@yourproject.net while still using the same private temporary inbox model that powers the main temp mail experience.
This is especially useful when you want an address that looks more like a normal business or personal email, when you need cleaner QA and testing workflows, or when you want to isolate a project from your real inbox without paying for a full email suite. The result is a practical middle ground between a public disposable inbox and a traditional hosted mailbox.
Who This Feature Is Best For
Custom-domain temp mail works best when you need privacy, flexibility, and ownership of the address pattern without the overhead of running full email hosting.
- Developers and QA teams who test registration flows, OTP delivery, and onboarding journeys at scale.
- Freelancers and indie builders who already own domains and want lightweight inboxes for side projects.
- Privacy-conscious users who want their own domain in place of a public temp-mail domain.
- Operators managing multiple sign-up channels who want separate addresses without cluttering a permanent inbox.
If your goal is broad, disposable email education, the main temp mail guide covers the general model. This page focuses on the custom-domain version of that workflow.
What You Need Before You Start
A short checklist now saves you from getting stuck in the middle of DNS setup later.
- A domain or subdomain that you own and can edit in your DNS provider.
- A Tmailor account signed in on iOS, Android, or the web.
- Access to your DNS panel at providers such as Cloudflare, Namecheap, GoDaddy, or another registrar.
- A few minutes for DNS changes and some patience while verification completes.
You do not need to buy separate mailbox hosting just to receive temp mail on your own domain. You are simply routing incoming mail to Tmailor for private, receive-only temporary inbox use.
How To Add Your Domain on Mobile or Web
The interface looks slightly different across devices, but the path is the same: sign in, open domain management, add your domain, update MX records, then wait for verification.
This walkthrough uses iOS screenshots because they are already available, but the same steps apply to Android and the web interface as well. If you prefer to use public domains first and switch later, you can always start from the main generator and move into custom domains afterward.
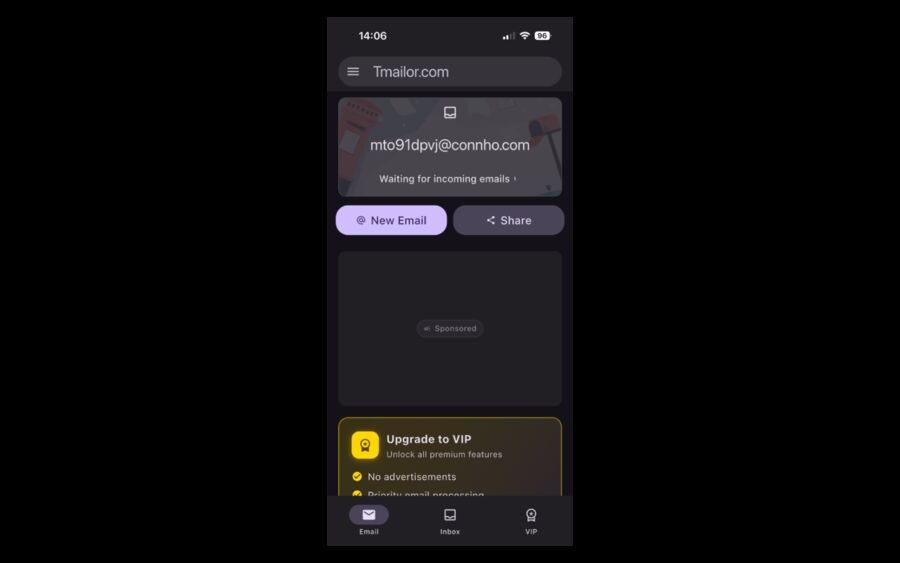
Open Tmailor and Access the Side Menu
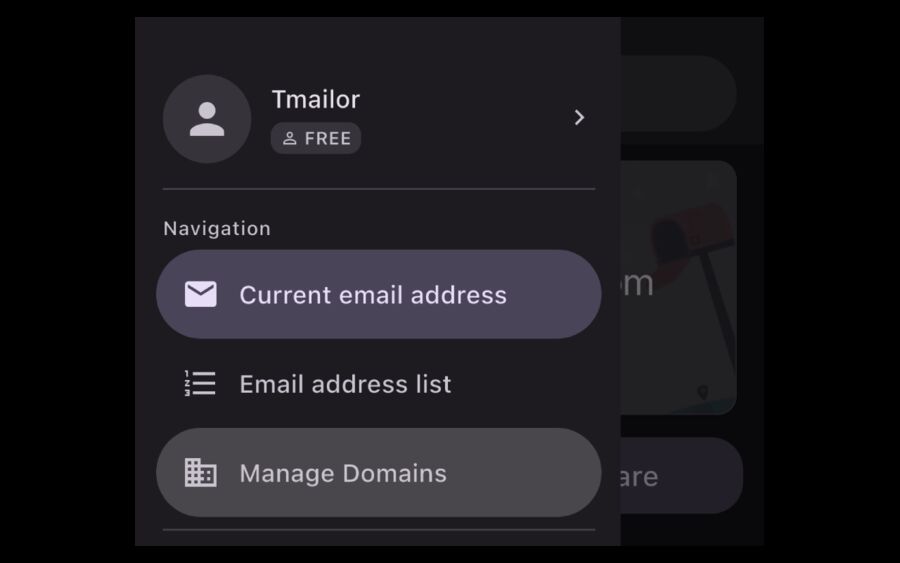
Open Tmailor on your iPhone, Android phone, or in a desktop browser. On mobile, tap the menu icon in the top corner to reveal the navigation drawer. On the web, open the equivalent menu or account area where feature pages and account tools are listed.
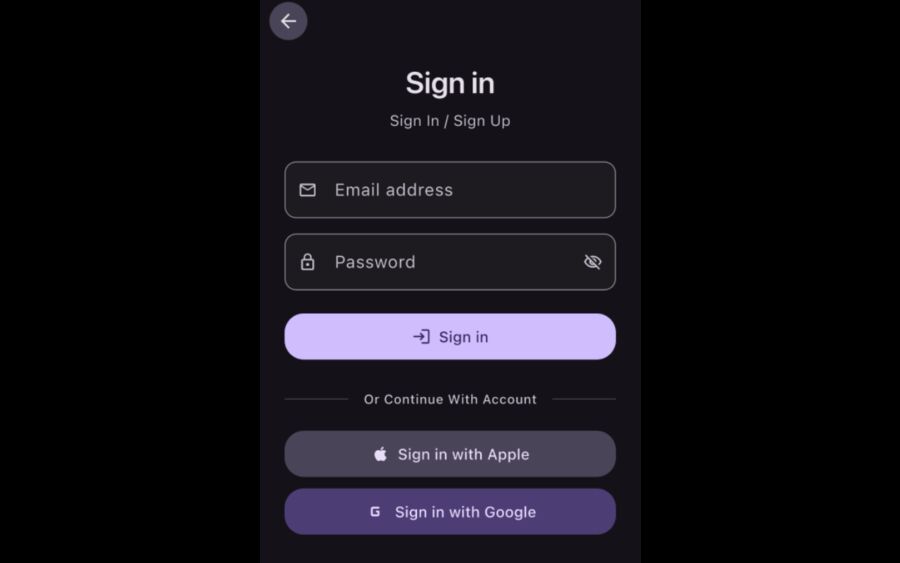
Sign In to Your Account
The custom domain feature is part of your account, so sign in first. You can use your email login, Google, or Apple on mobile. On the web, use the same account so your domain list and tokens stay tied to the same profile.
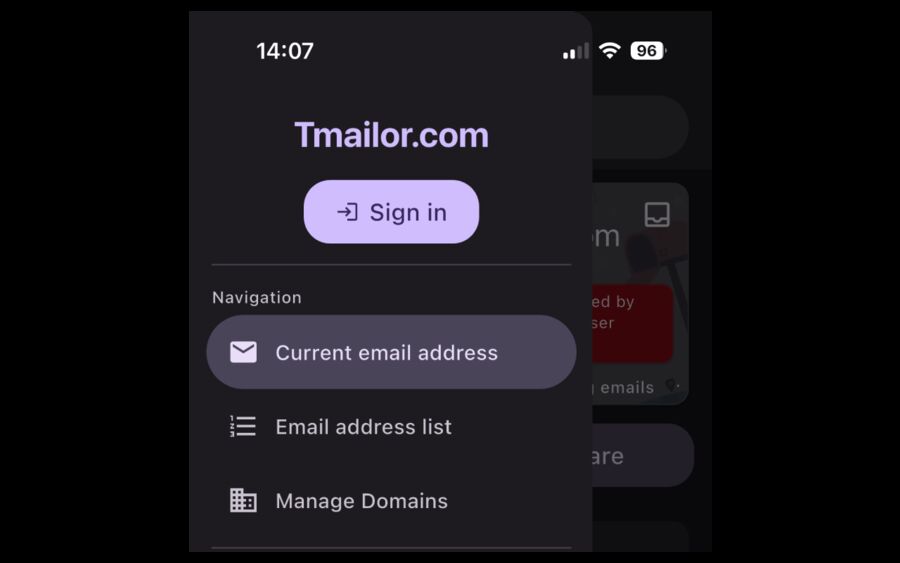
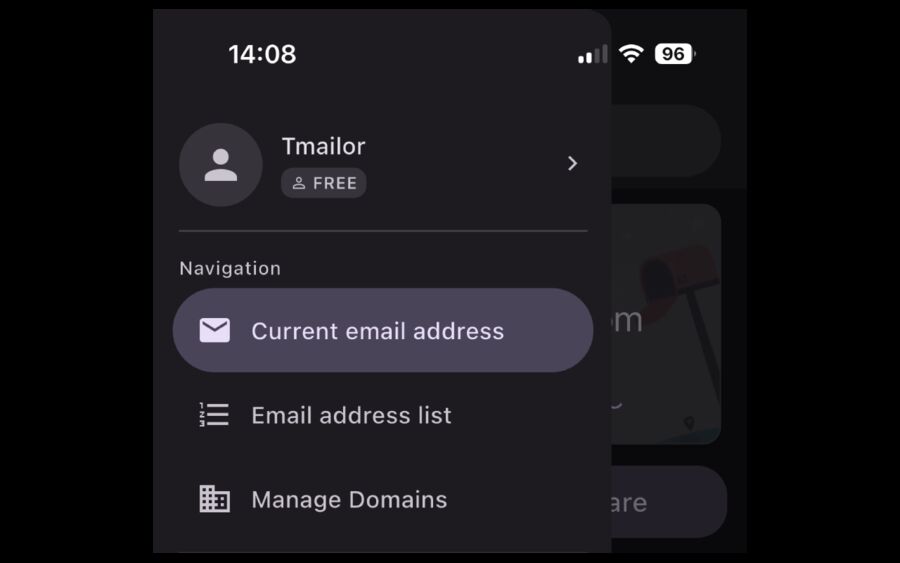
Open Manage Domains
Inside the account or side menu, open Manage Domains. This is the control area where you can add a new domain, review verification status, and later remove or revisit any domain you connected earlier.
Add Your Domain Name
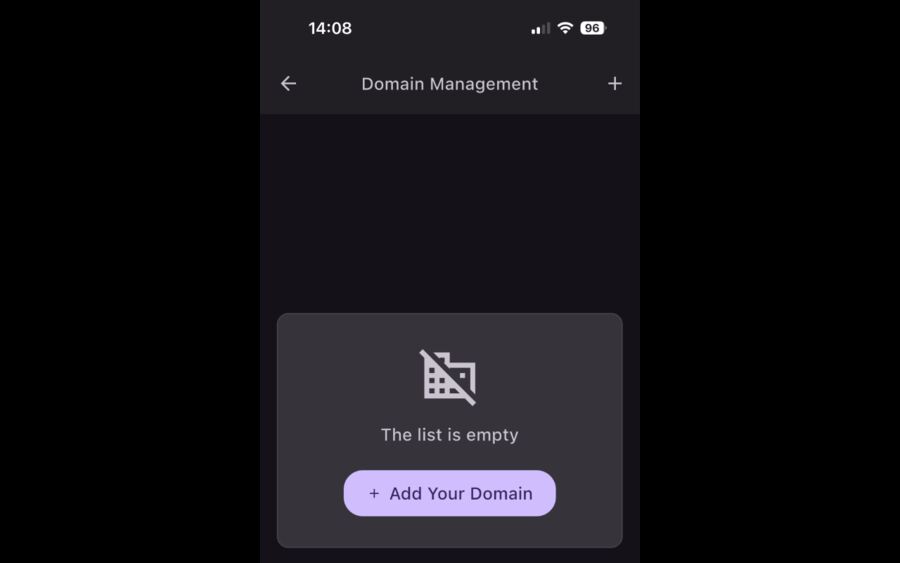
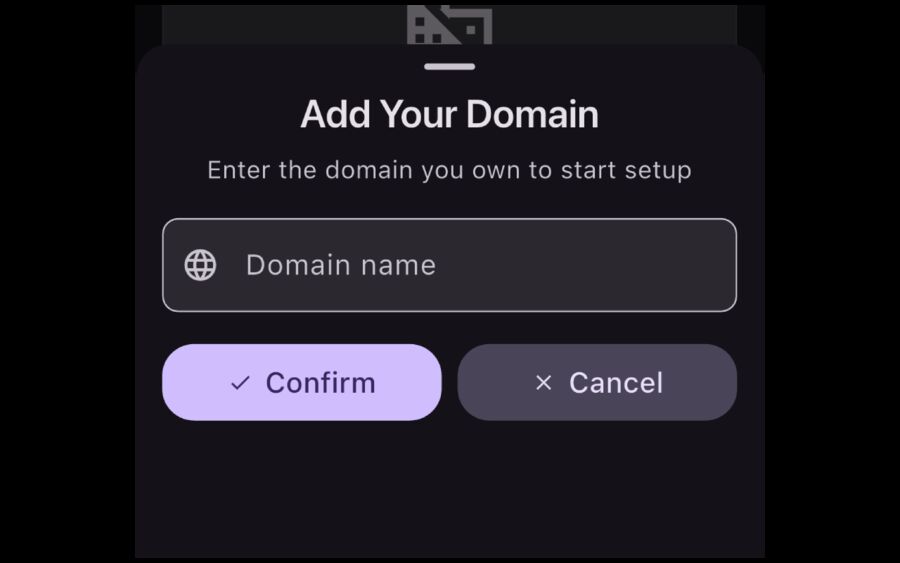
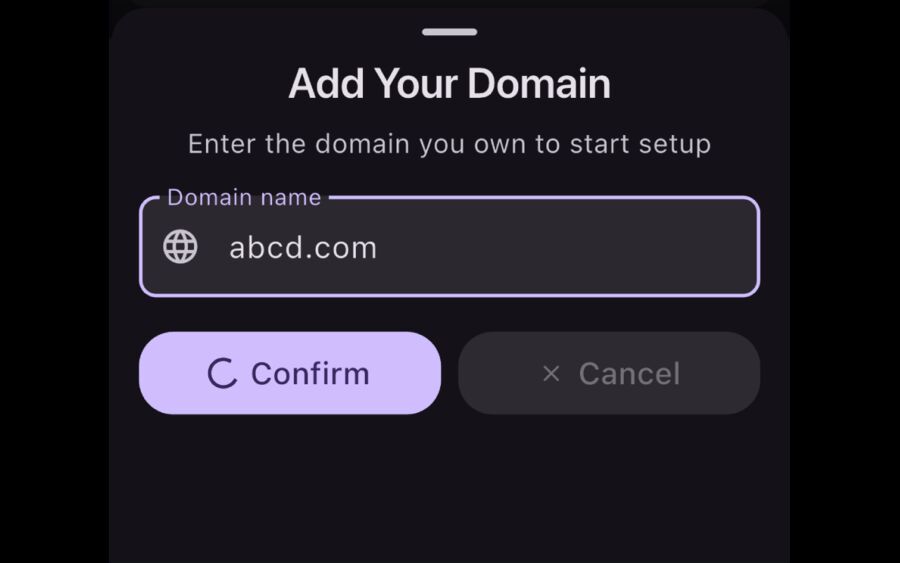
Tap or click Add Your Domain, enter the domain or subdomain you own, then confirm. The domain will be added to your list so Tmailor can generate the routing details you need for DNS.
Update MX Records in Your DNS Provider
Open the domain details page and follow the MX instructions shown there. In most cases, you remove conflicting old MX records first, then add the MX target required by Tmailor. Make the changes in Cloudflare, Namecheap, GoDaddy, or whichever DNS panel controls your domain.

Wait for Verification and Start Receiving Mail
After DNS changes propagate, Tmailor verifies the domain and the setup status changes to ready. From there, you can generate custom-domain temp mail addresses and use them the same way you use standard addresses: receive OTPs, confirmation links, and low-stakes sign-up email without exposing your permanent inbox.
How Custom-Domain Temp Mail Works
Your domain controls the identity of the address, while Tmailor handles the temporary receive-only inbox behavior behind the scenes.
Once the MX routing is in place, mail sent to your custom-domain address reaches Tmailor the same way mail reaches any other disposable inbox on the platform. That means you still get the familiar privacy-first behavior: incoming-only delivery, temporary message visibility, and the option to reopen the same address later with a saved token. If you want the broader explanation of how this routing model works, the technical end-to-end explanation breaks down the email path in more detail.
Custom Domain vs Public Domain
Both options are useful; the right one depends on whether you value speed of setup or control over the email identity.
| Factor | Custom Domain Temp Mail | Public Temp Mail Domain |
|---|---|---|
| Setup | Requires one-time DNS configuration | Instant, no setup |
| Address identity | Uses your own domain or subdomain | Uses a shared public domain |
| Blocklist exposure | Often lower because the domain is private to you | Higher on sites that flag known disposable domains |
| Best for | Projects, QA, privacy workflows, branded testing | Fast one-off sign-ups and instant throwaway use |
| Cost | Free inside Tmailor; you only need your own domain | Free |
Best Use Cases
The strongest use cases are the ones where you want a more natural-looking address without the overhead of running a full mailbox service.
QA and development testing
Teams can create purpose-specific inboxes for registration tests, password reset checks, and transactional email QA. This is especially useful when combined with the patterns described in the guide to testing sign-up flows at scale.
Freelancers, side projects, and launch pages
If you own domains for projects that do not need full email hosting yet, custom-domain temp mail gives you lightweight receiving addresses for trials, partner sign-ups, and verification flows.
Privacy-first personal workflows
You may want the convenience of temp mail without presenting a visibly disposable public domain. Your own domain gives you that extra layer of control.
Troubleshoot Common Problems
Most setup issues come down to account access, incomplete DNS changes, or normal DNS propagation delay.
The status still says setup is not complete
Double-check that old MX records were removed where required and that the new MX record matches the details shown inside Tmailor exactly. If everything looks right, wait a little longer and refresh.
You cannot find Manage Domains
Make sure you are signed in to your Tmailor account. The feature is account-based, so the menu item may not be available before login. On mobile it sits inside the side menu; on the web it appears in the relevant account area.
Mail is not arriving to the custom-domain inbox
Start by re-checking MX propagation and making sure no old records still conflict with the new routing. If the domain verifies correctly but mail still feels unreliable, compare the sending workflow against the advice in the domain rotation guide and the OTP-focused articles on the site.
You want to stop using the domain
Remove the domain from your Tmailor account and then update or delete the MX record in your DNS provider so mail no longer routes there.
The Bottom Line
Custom-domain temp mail gives you the privacy and convenience of a disposable inbox with the identity control of your own domain. It is free, practical, and available across iOS, Android, and the web. If you already own a domain and want a cleaner way to receive sign-up email, OTPs, and verification links without exposing your real inbox, this feature is one of the smartest upgrades in the Tmailor workflow.
Ready to try it?
Frequently Asked Questions
Is custom-domain temp mail really free?
Yes. Tmailor lets you add your own domain for temp mail without a separate fee for the feature. You only need to own the domain and be able to edit its DNS records.
Does this work on Android and on the web too?
Yes. The custom domain feature is available on iOS, Android, and the web. This guide uses iPhone screenshots, but the setup flow is effectively the same across platforms.
Do I need a VIP account to add my own domain?
No. The custom domain feature is available without requiring a VIP plan.
What DNS changes do I need to make?
You need to follow the MX instructions shown inside the domain details screen in Tmailor. In general, that means removing conflicting MX records and adding the MX target required for your custom domain setup.
How long does verification usually take?
It depends on DNS propagation. Some domains verify quickly, while others take longer depending on the DNS provider and cache timing.
Can I use a subdomain instead of the root domain?
Yes, in many cases you can add a subdomain and configure its MX record the same way. Enter the subdomain you control, then follow the DNS instructions shown by Tmailor.
How long do messages stay in the inbox?
Messages are typically visible for about 24 hours. The address itself can still be reopened later if you saved the access token.
Can I send emails from a custom-domain temp mail address?
No. Custom-domain addresses on Tmailor are receive-only, just like standard temp mail inboxes on the service.
Does token-based reuse still work with custom domains?
Yes. Custom-domain inboxes follow the same token-based reuse concept, so you can reopen the same address later if you saved its token.
Why use a custom domain instead of a public disposable domain?
A custom domain gives you more control over the address identity, can look more natural in sign-up flows, and may avoid some of the friction that affects known public disposable domains.